How to Setup WOTgreal
Hi,
Today, I'll help you out in installing and setup WOTgreal , an editor for unreal scripting. It comes with Intellisense ( a feature made popular by Microsoft Visual Studio), which really helps in faster and better coding.
I am not saying, it is the only editor solution out their, but it is one of the most convenient after Notepad++.
First of all, download WOTgreal from here , along with WOTgreal development kit.
We need the development kit to enable some of the features, which are not available with installer package.
Install the WOTgreal with defaults. Do not start the program yet. Unzip the development kit and copy all of the files in main WOTgreal installation folder.
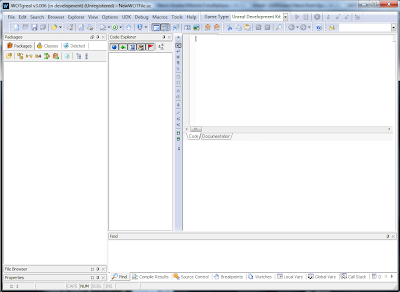
Now, start the WOTgreal and wait for it to load the initial start setup.
On menu bar, select Options , which results in a dialog window by the name of "Preferences".
In left side list pane, all options are presented in categorize form , with "General Information" selected with result showing off in right side pane.
Select "Game Information" from left side pane.
Press button labeled "Edit Game Types" , which results in following window;
Press "Add".
Enter the following data in resulting window.
Close "Edit Game Types", you will be directed to "Preferences" window.
Select "UDK" from Game Types and enter the following information accordingly;
Note : you must select the exact directories, as show above on your system drive.
Following information is originally taken from forums at epic games.
Originally posted by Blade[UG]
Select "Compile & Debugging" from left side pane in "Preferences" window.
Your are back in your WOTgreal IDE and all of the packages are visible in left pane.
Happy Coding :)
Today, I'll help you out in installing and setup WOTgreal , an editor for unreal scripting. It comes with Intellisense ( a feature made popular by Microsoft Visual Studio), which really helps in faster and better coding.
I am not saying, it is the only editor solution out their, but it is one of the most convenient after Notepad++.
First of all, download WOTgreal from here , along with WOTgreal development kit.
We need the development kit to enable some of the features, which are not available with installer package.
Install the WOTgreal with defaults. Do not start the program yet. Unzip the development kit and copy all of the files in main WOTgreal installation folder.
Now, start the WOTgreal and wait for it to load the initial start setup.
- Setup Wizard : press next.
- Configure Game Type: Do not select anything and press next.
- Configure Look & Feel : choose Keyboard settings, Highlighter settings & Skins. I usually leave it as it is.
- Class / Package Tree : keep the check box checked and press next.
- WOTgreal will ask you to associate .uc file with it. Press "Yes".
- We are ready to work.
 |
| WOTGreal first startup |
On menu bar, select Options , which results in a dialog window by the name of "Preferences".
 |
| General Information pre-selected |
In left side list pane, all options are presented in categorize form , with "General Information" selected with result showing off in right side pane.
Select "Game Information" from left side pane.
 |
| Select Edit Game Type |
Press button labeled "Edit Game Types" , which results in following window;
 | |
| Configure Game Types |
Press "Add".
Enter the following data in resulting window.
- Display Name : UDK
- Game Exe Name : udk
- Map File Filter : UDK Map Files (*.udk)|*.udk
- Map File Extension : .udk
- Menu Name : UDK
- Allow Mutator : Checked
- Use "Extends" instead of "Expands": Checked
- Game Architecture : UDK Selected
 |
| Edit Game Type Window with my Selection |
Close "Edit Game Types", you will be directed to "Preferences" window.
Select "UDK" from Game Types and enter the following information accordingly;
- Game INI file : UDKEngine.ini (It can be found in UDKGame\Config\ folder)
- User INI : UDKGame.ini (It can be found in UDKGame\Config folder)
- UCC.exe File : UDK.exe (Binaries\Win32\ folder )
- Game Root Dir : It reflects your game folder in \Development\Src\ folder)
- Source Root Dir : \Development\Src
- Log Dir : \UDKGame\Logs
- Test Map : Name of the map you want to use (usually ExampleMap.udk)
 |
| Completed Game Information Window |
Note : you must select the exact directories, as show above on your system drive.
Following information is originally taken from forums at epic games.
Originally posted by Blade[UG]
Select "Compile & Debugging" from left side pane in "Preferences" window.
- leave "Pre-Compile" tab as it is.
- Select "Run this program /batchfile /command line to compile" in "Compile" tab
- Click "Default UCC switches" and select "-silent" option.
- Check "Let WOTgreal parse log file " option from "Post-Compile" tab.
- Click "Apply" button to get back to main WOTgreal editor window.
 |
| Compile Tab with Default UCC Selection WIndow |
 |
| Post-Compile Window |
Your are back in your WOTgreal IDE and all of the packages are visible in left pane.
Happy Coding :)


Pretty good post. I just stumbled upon your blog and wanted to say that I have really enjoyed reading your blog posts.
ReplyDeleteShop Towel
Caesars Casino Review (2021) - Get $10 Free with No Deposit
ReplyDeleteCaesars Casino Review · 1. Claim your $10 free septcasino bonus wooricasinos.info and receive up to $20 바카라 사이트 in casino credits gri-go.com (30 Free Spins) · 2. Play Slots at 바카라사이트 Caesars Casino.