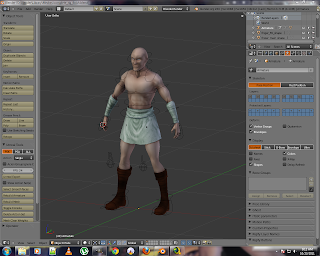
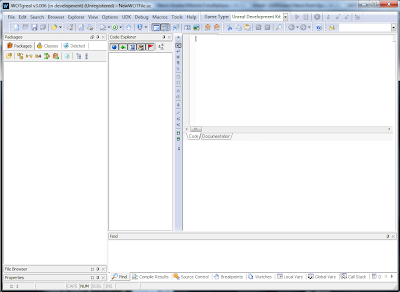
Modfiy Premade Blender Skeletal Mesh & Export to UDK.
Today, I'll modify a ready made skeletal mesh , rigged with Riggify for export to udk.
Basic Model & Rig were made by Lee Salvemini (Sintel & Elephants Dream) in a very detailed rigging tutorial hosted here. I'll be using Blender 2.60 with Darknet's Psk/Psa exporter version 2.3.
I strongly recommend you all to step by step work with Lee's tutorial, to grasp the rigging concepts of Blender. It helped me a lot. For impatient, please download the file.
http://cgmasters.net/blenderguru/complete_rig_finish.blend
Ok, Lets get started.
Start Blender & Load "comlete_rig_finish.blend".
Go to Object Data Tab -> Display Options and uncheck Shape and check X-ray options.
Our skeleton is not fully visible. lets rectify it before moving on further.
In Object Data -> Skeleton Options check the last layer in "Layers:" category. this will result in showing up all the bones in armature, which were intentionally left hidden for animation purpose by the original author.
First scale the mesh & armature to the size, in which we want it in UDK.
Go to front view by pressing "1" on numeric pad.
Press "Shift + C" to align the 3d Cursor to the center (0,0,0) on (X, Y, Z ) plain.
Select mesh & "Shift" select armature then Press "S + 48" on numeric keypad and "Enter".
To check the height/Size of your mesh & armature. you can activate "measure panel" add-on from Addons menu (In user preferences).
After enabling the add-on, a panel will be visible in Properties Panel (Press "N" key to Toggle).
Deselect everything by pressing "A" then "SHIFT+A" and add a cube. Grab Translate widget "Z" arrow and move it towards the top of the mesh. Measure info panel will display the "X,Y,Z" and "Dist" from the origin (3DCursor). your mesh should be around 86 (Edit : scale around 96 BU , cause UDK SM are 96 units tall) Blender Units.
Delete the cube and uncheck "Draw Distance" in Measure Panel.
Select the Armature then "Tab" to go in edit mode. Press "A" to deselect the mesh.
Press "Shift + A" to add up a new bone at 3dCursor. currently, the bone is very small, scale it to your liking (dont forget to fully select it). Name it "Root" . Switch to Side view (3 on Numpad).
Press "R+x+-90" to rotate the Root bone at its axis. move and adjst the bone , so that it is exactly in level with the feet, while in side view.
Now, to export this skeletal-mesh to udk, we need to parent all UN-pareneted bones to our freshly added Root bone (which is handy in moving all of the mesh & armature at a time). following bones should be parented.
hips_main
foot_IK_shape.L
foot_IK_shape.R
Select the above mentioned bones one by one and in edit mode and from "Bone" tab in property panel, select "Relations -> Parent" and type "Root".
Get out of Edit Mode. Select the Armature in Object Mode. Press "Ctrl+A" and select "Location" from menu , again Press "Ctrl+A" and select "Rotation & Scale".
Deselect Armature and Select the Mesh in Object Mode. Press "Ctrl+A" and select "Location" from menu. Repeat and select "Rotation & Scale".
We are Ready to export our Skeletal-Mesh for UDK.
From File Menu, Select Export -> Skeleton Mesh / Export Data (psk/psa) and save the export file, where ever you deem appropriate.
If you have followed the exact steps, you'll have 01 file "complete_rig_finsih.psk" on your drive.
You are ready to import it in UDK.
Fire up UDK , Open Content Browser and Press Import Button. Select your exported "complete_rig_finish.psk"file and double click and import.
Your Skeletal-Mesh is imported in UDK. It's back is towards us, lets correct it.
Double click at Skeletal-Mesh , which will be opened in AnimSet Viewer. Go down in Properties Panel, Select "Rot Origin" -> "Yaw" and change "0" to "180". Now your skeletal mesh is facing you.
That's it with modifying , exporting & importing pre-made blender mesh & armature to udk.
Basic Model & Rig were made by Lee Salvemini (Sintel & Elephants Dream) in a very detailed rigging tutorial hosted here. I'll be using Blender 2.60 with Darknet's Psk/Psa exporter version 2.3.
I strongly recommend you all to step by step work with Lee's tutorial, to grasp the rigging concepts of Blender. It helped me a lot. For impatient, please download the file.
http://cgmasters.net/blenderguru/complete_rig_finish.blend
Mesh & Armature used in tutorial are not my property
and are not usable in commercial application or usage. I am using them
just for educational purpose. If you like to use them in your project,
please contact the original owners.
Ok, Lets get started.
Start Blender & Load "comlete_rig_finish.blend".
 |
| complete_rig_finish.blend |
Go to Object Data Tab -> Display Options and uncheck Shape and check X-ray options.
 |
| Shapes Off - Name & X-ray On |
Our skeleton is not fully visible. lets rectify it before moving on further.
In Object Data -> Skeleton Options check the last layer in "Layers:" category. this will result in showing up all the bones in armature, which were intentionally left hidden for animation purpose by the original author.
 | |
| Full Skeleton Visible |
First scale the mesh & armature to the size, in which we want it in UDK.
Go to front view by pressing "1" on numeric pad.
Press "Shift + C" to align the 3d Cursor to the center (0,0,0) on (X, Y, Z ) plain.
 | |
| Mesh & Armature Centered |
Select mesh & "Shift" select armature then Press "S + 48" on numeric keypad and "Enter".
To check the height/Size of your mesh & armature. you can activate "measure panel" add-on from Addons menu (In user preferences).
 | |
| Measure Panel selected in User Preferences-> Addons |
After enabling the add-on, a panel will be visible in Properties Panel (Press "N" key to Toggle).
 | |
| Measure Panel |
Deselect everything by pressing "A" then "SHIFT+A" and add a cube. Grab Translate widget "Z" arrow and move it towards the top of the mesh. Measure info panel will display the "X,Y,Z" and "Dist" from the origin (3DCursor). your mesh should be around 86 (Edit : scale around 96 BU , cause UDK SM are 96 units tall) Blender Units.
 | |
| Distance of 86 BU |
Delete the cube and uncheck "Draw Distance" in Measure Panel.
Select the Armature then "Tab" to go in edit mode. Press "A" to deselect the mesh.
Press "Shift + A" to add up a new bone at 3dCursor. currently, the bone is very small, scale it to your liking (dont forget to fully select it). Name it "Root" . Switch to Side view (3 on Numpad).
Press "R+x+-90" to rotate the Root bone at its axis. move and adjst the bone , so that it is exactly in level with the feet, while in side view.
 |
| Root Bone adjusted and moved |
Now, to export this skeletal-mesh to udk, we need to parent all UN-pareneted bones to our freshly added Root bone (which is handy in moving all of the mesh & armature at a time). following bones should be parented.
hips_main
foot_IK_shape.L
foot_IK_shape.R
 |
| Blue Bones need to be Parented |
Select the above mentioned bones one by one and in edit mode and from "Bone" tab in property panel, select "Relations -> Parent" and type "Root".
 |
| Parented Bones |
Get out of Edit Mode. Select the Armature in Object Mode. Press "Ctrl+A" and select "Location" from menu , again Press "Ctrl+A" and select "Rotation & Scale".
Deselect Armature and Select the Mesh in Object Mode. Press "Ctrl+A" and select "Location" from menu. Repeat and select "Rotation & Scale".
We are Ready to export our Skeletal-Mesh for UDK.
From File Menu, Select Export -> Skeleton Mesh / Export Data (psk/psa) and save the export file, where ever you deem appropriate.
 |
| Export Menu |
 |
| Saving Options |
 |
| Succesful Export |
If you have followed the exact steps, you'll have 01 file "complete_rig_finsih.psk" on your drive.
You are ready to import it in UDK.
Fire up UDK , Open Content Browser and Press Import Button. Select your exported "complete_rig_finish.psk"file and double click and import.
 |
| Import Dialog Box |
 |
| Skeletal Mesh Imported |
Your Skeletal-Mesh is imported in UDK. It's back is towards us, lets correct it.
Double click at Skeletal-Mesh , which will be opened in AnimSet Viewer. Go down in Properties Panel, Select "Rot Origin" -> "Yaw" and change "0" to "180". Now your skeletal mesh is facing you.
 |
| Rotated Skeletal-Mesh |
That's it with modifying , exporting & importing pre-made blender mesh & armature to udk.
I haven't added any animation. However, I'll put up a link to an animation walk cycle, after completing it. you'll be able to use it with file made in this tutorial.
A simple walk cycle made with this SM is here.


How'd you get that PSK/PSA script to work? What Blender version are you using?
ReplyDeleteI've been trying like a million different ones and I either can't enable them or they don't show up at all in the add-ons window. (I'm using Blender 2.65)
Hi , And sorry for very very late reply.
DeleteI was using Blender 2.60 with PSK/PSA script Version 2.3 for SM export.
I currently don't use UDK , so can't help you out with it. but i am sure, if you follow the procedure exactly, your SM will export just fine.