Posts

Showing posts with the label tutorial

Tip : Build Modifier | Blender3d

Hi, Today, I was playing with modifiers and stumbled upon Build Modifier. This modifier is cool in a sense, that it allows you to see your pre made mesh , created step by step in front of you like an animation. Take a look. The best thing is , it is very easy to use. Just create your model. Join all the parts and Add the build modifier. Start   lets you select the frame number, from where to start the build up animation. Length allows you to set up the number of frames, your animation is based on. Seed randomizes the face build up sequence ( It is dependent on the Blend Internal Datablocks creation order). You can change the build up sequence by select Sort Mesh Elements >> Space Bar Menu . Here is the link to Official Documentation Build Modifier
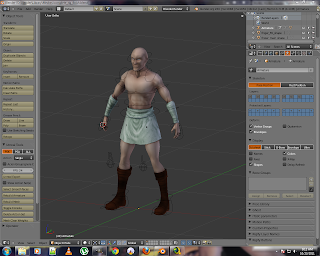
Modfiy Premade Blender Skeletal Mesh & Export to UDK.

Image
Today, I'll modify a ready made skeletal mesh , rigged with Riggify for export to udk. Basic Model & Rig were made by Lee Salvemini ( Sintel & Elephants Dream ) in a very detailed rigging tutorial hosted here . I'll be using Blender 2.60 with Darknet's Psk/Psa exporter version 2.3. I strongly recommend you all to step by step work with Lee's tutorial, to grasp the rigging concepts of Blender. It helped me a lot. For impatient, please download the file. http://cgmasters.net/blenderguru/complete_rig_finish.blend Mesh & Armature used in tutorial are not my property and are not usable in commercial application or usage. I am using them just for educational purpose. If you like to use them in your project, please contact the original owners. Ok, Lets get started. Start Blender & Load "comlete_rig_finish.blend". complete_rig_finish.blend Go to Object Data Tab -> Display Options and uncheck Shape and check X-...

Blender Low Poly Window Texturing & Unwrap

Image
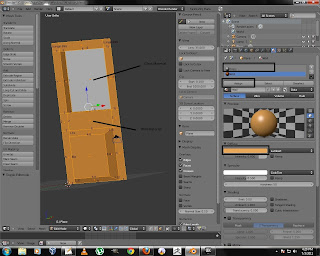
OK, in our previous tutorial , we made a low poly mesh of window. in this tutorial, we will texture & export it for usage in UDK. So, fire up your blender and load the saved file. 1.    First select the Window Top Inset Panel ( I call it glass). 2.    In Material panel, select a new material by pressing New button & name it Glass. 3.    Give it any color by choosing it from diffuse panel. 4.    Press Ctrl+I to inverse your selection (Make sure, your mouse cursor is in 3dWindow. 5.    Now, Create one more material and name it wall. and choose a color to your liking. 6.    Press Assign button to assign the selected material to the walls of the window. 7.    now, your mesh has 2 different materials, which will come handy in UDK later on. All Materials Added 8.    Lets unwrap our mesh, so that we can put some textures on it. 9....